First steps
In this section we will learn the basics of using FluXY by making a torch from scratch.
Basic fluid
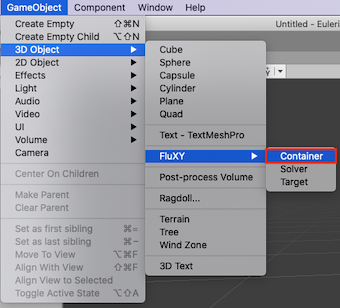
Click GameObject->3D Object->FluXY->Container. This will create a new fluid container in your scene.
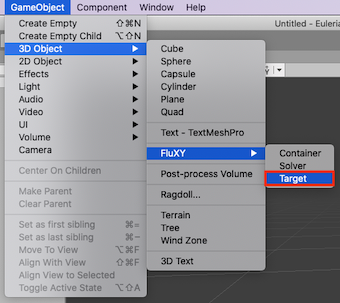
Now click GameObject->3D Object->FluXY->Target to create a target, and (if it already isn’t) place it in the same position as your container.
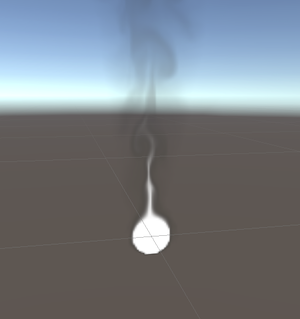
Click play and you’re done! you should see a basic smoke plume simulation running. You can move the target around the container, as see how it affects both the fluid’s density and velocity.
Facing the camera
Now you have a 2D simulation, which looks ok and is very cheap to calculate. However, we can make it look 3D using a simple trick: make the container face your camera!
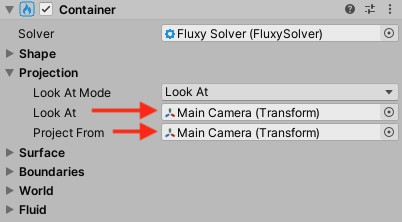
Drag your camera object into both the container’s lookAt and projectFrom slots. Now the simulation will face your camera wherever you look, and the target will be projected onto it giving a 3D-ish look to the simulation.
Fire
So far we just have some white smoke going on. Let’s try and make it behave and look more like fire. To change how fluid behaves, select your FluxyContainer: under the “Fluid” section you will find fluid physics parameters.
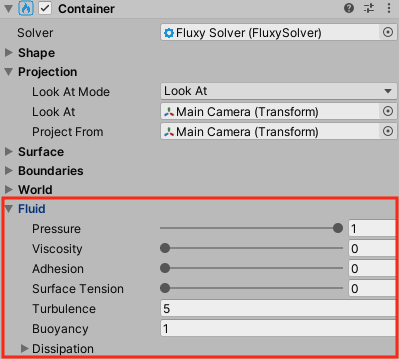
Fire tends to be very turbulent and have a lot of small vortices, so let’s crank up turbulence to around 40. It’s also much hotter than the air around it, and hot air rises: we’ll achieve this by increasing buoyancy to 8:

Now the fluid is more swirly and rises faster, however it’s still flat white.To change how it looks, let’s create a material for it: Go to Assets->Create->Material, and assign the Fluxy/BasicFluid to it.
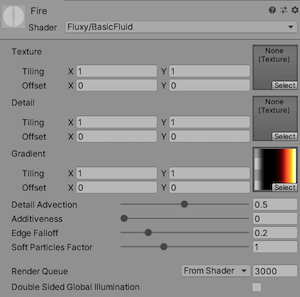
This basic shader included with FluXY has a number of rendering features. One of them is to map fluid density to a color gradient. Use the included "FireGradient" texture, low densities will be mapped to a transparent color, then progressively higher densities to smoke black, red, yellow and white. You can of course use any gradient texture of your own.
After assigning this new material to the container’s MeshRenderer component, the simulation will look like a small fireball:
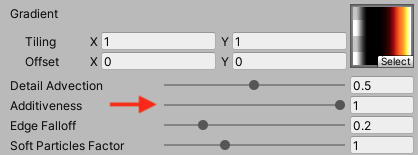
If you'd prefer brighter looking fire, one way to get that is to increase the "additiveness" slider in the material to 1. This will use additive blending instead of regular alpha blending:
Making a torch
Let’s say we put this fire atop a wooden stick. That’s the textbook definition of a torch, right? Create an empty GameObject and call it "Torch". Then create a cylinder and parent it under the empty object, you may scale it to make it more stick-like. Also put the Container and the Target objects inside the Torch object, should look like this:
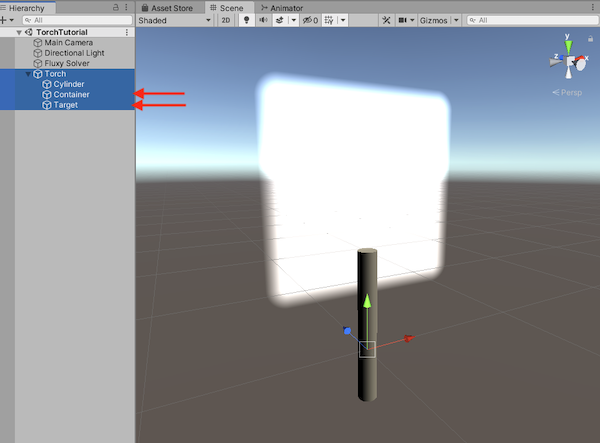
When you rotate or move the Torch object, fire will react realistically to movement:
This introduction barely scratches the surface of what you can do with FluXY. Read on for further insight! You can also take a look at the included sample scenes for more ideas and use cases.