FluxyContainer
To create a container object, go to GameObject->3D Object->FLuXY->Container. To add a container component to an existing object, go to Component->Physics->FluXY->Container.
Containers simply contain fluid. Each container exposes physical properties of the fluid in them, such as viscosity or turbulence. Containers are always rectangular in shape, you can't have circular or star-shaped containers, but you can specify their width and height. You can also specify what happens when fluid gets close to the container's edges, and what the initial contents of the container are.
The container inspector is organized into multiple foldable panels. Each one contains parameters pertaining to a specific aspect of the container. Now we will go over all parameters in each panel.

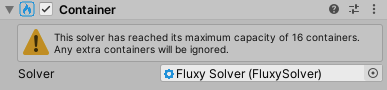
Solver
Reference to the solver in charge of managing this fluid container.
Shape
All parameters in this panel affect the size and chape of the container. Usually, containers are flat rectangles. You can specify their size and the amount of subdivisons in each axis. However, you can also use a completely custom mesh.

Container shape
Shape type used for the container. There's 3 options available:
- Plane
- A simple rectangular plane. This is the default.
- Volume
- A volume defined by a rectangular prism. This is typically used together with volumetric rendering.
- Custom
- Allows you to use a custom mesh as the container shape.
Custom mesh
Mesh used as container. Only available when shape is set to "Custom".
Size
Local-space size of this container (in meters). Behaves slightly differently depending on the shape selected:
- Plane
- Z value is ignored, as the size of a plane in the Z axis is always 0. Only the X and Y values will be used.
- Volume
- All 3 values (X, Y and Z) are used to determine volume size.
- Custom
- Z value is ignored, and X, Y values will scale the texture space of said custom mesh.
Subdivisions
Amount of horizontal and vertical subdivisions in the container's plane mesh. Only available when container shape is set to "Plane". This is often used together with shaders that implement vertex displacement.
Projection
These paremeters control how targets are projected into the container, and whether the container should be facing any specific transform.

Look At Mode
Whether the container should just look towards the Look At transform, or copy its orientation.
Look At
If not null, the container will orient itself to look at this transform. Typically, a camera transform would be used here.
Project From
Transform used as the origin point to project targets onto this container. If null, targets will be projected along the container's normal vector. Typically, a camera transform would be used here.
Surface
These parameters let you specify the surface of the container: whether it should be cleared to some specific color/density pattern, and perturb its surface normals.

Clear Texture
Texture used to clear the contents of this container.
Clear Color
Color used to clear the contents of this container. Will tint the Clear Texture, if any.
Surface normals
Normal map used to perturb the container's normal. This will affect the fluid's flow direction.
Normal tiling
How many times to tile the surface normal map in each axis.
Normal scale
Intensity of the surface normal map.
Boundaries
You can specify what happens at the container's boundaries: fluid can flow trough boundaries, collide against them, or vanish when close to them.
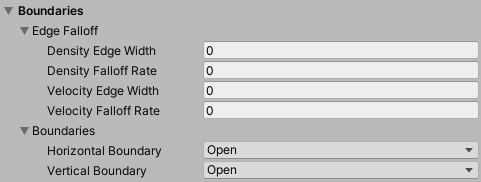
Edge Falloff
Density and velocity falloff at the edges of the container. You can specify both the width of the falloff region (expressed in normalized coordinates), and the falloff rate. This can be used to fade out fluid as it approaches the limits of the container, hiding the fact that simulation only takes place within the container's area.

Boundaries
Boundary conditions at the container's edges. This determines what happens when fluid reaches the edge of the container. You can specify the condition for the horizontal and vertical edges independently, and there's 3 different conditions to choose from:
- Open
- Fluid is allowed to flow past the edges of the container.
- Solid
- Edges act as solid walls, fluid is not allowed to flow past them.
- Periodic
- Fluid is allowed to flow past the edge of the container, wrapping to the opposite edge.


World
The parameters in this panel control how world-space external forces affect the fluid in this container.

Velocity Scale
Percentage of the container's world-space velocity that gets applied to the fluid.
Set both velocity scale and acceleration scale to 0 if you want the fluid to ignore any world-space movement of the container. If you then constrain the container to an object (using Unity's PositionConstraint component, for instance), the results will mimic an infinite simulation domain: fluid will look as if simulated in world-space, the container being just a "window" into the fluid. You can see an example of this in the included InfinitePool sample scene.


Acceleration Scale
Percentage of the container's world-space acceleration that gets applied to the fluid.
Gravity
World-space gravitational acceleration applied to the fluid.
External Force
World-space external force applied to the fluid. You can use this to simulate wind, for instance.

Light source
This light source's information (position, direction, color, etc) will be passed to the material used to render this container. Directional and point lights are supported. This is convenient for shaders that implement some lighting integration, such as the included volumetric shader.
Targets
List of target components that should interact with this container. Note the targets listed here will always be considered, in addition to the ones provided by any target provider component (such as FluxyTargetDetector).
Fluid
The parameters in this panel affect fluid dynamics.

Pressure
Percentage of internal pressure applied to the fluid simulation. A value of 1 will strive to remove any divergence from the fluid's velocity field, yielding incompressible fluid. A value of 0 will allow the fluid to freely expand and compress.

Viscosity
Viscosity of the fluid. Viscous fluids will flow slower and come to a rest faster.
Adhesion
Amount of fluid that sticks to the surface of the container. A value of 0 means fluid is allowed to flow regardless of density. A value of 1 will not allow fluid to flow at all.
Surface tension
Tendency of the fluid to form smooth, round shapes.
Turbulence
Fluid "swirlyness". This determines the amount of curls and vortices in the fluid.
Buoyancy
Density of the fluid relative to the surrounding air. More buoyant fluids will rise up, less buoyant fluids will fall down.
Dissipation
Speed at which fluid density vanishes. You can specify dissipation independently for each of the 4 density channels.
